Role and Permission Management
This document provides a comprehensive overview of the permissions associated with each user account type.
Adding a User and Managing Roles on GEO4X
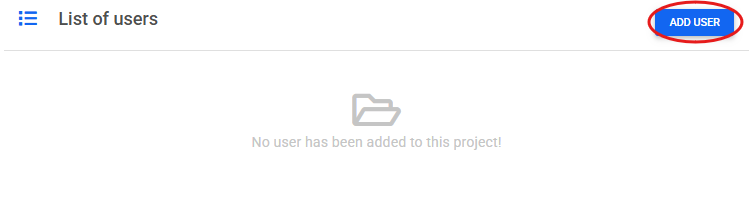
1. Select a Project
To add a user, start by selecting a project from your list, then click on the “Add User” button.
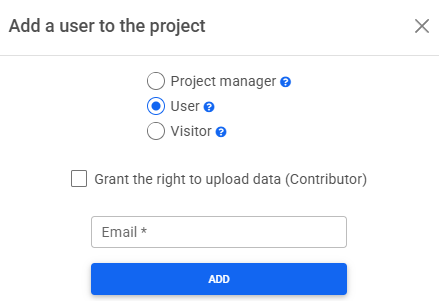
2. Add a User or Visitor
In the pop-up window that appears:
- Choose the desired role: User or Visitor.
- Enter the email address of the person you want to invite.
- Click Confirm.
👉 The person will automatically receive an invitation email to join the project.
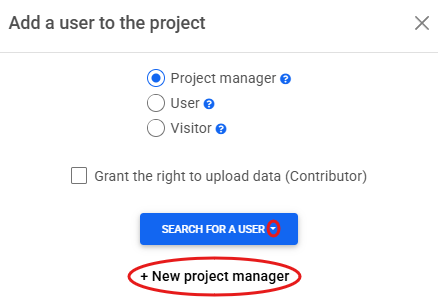
3. Add a Manager
To assign the Manager role, follow these two steps:
- Create their profile from the same pop-up window.
- Once the profile is created, return to the project, then select their email address from the user dropdown menu.
✅ At this stage, the project invitation will be sent by email.
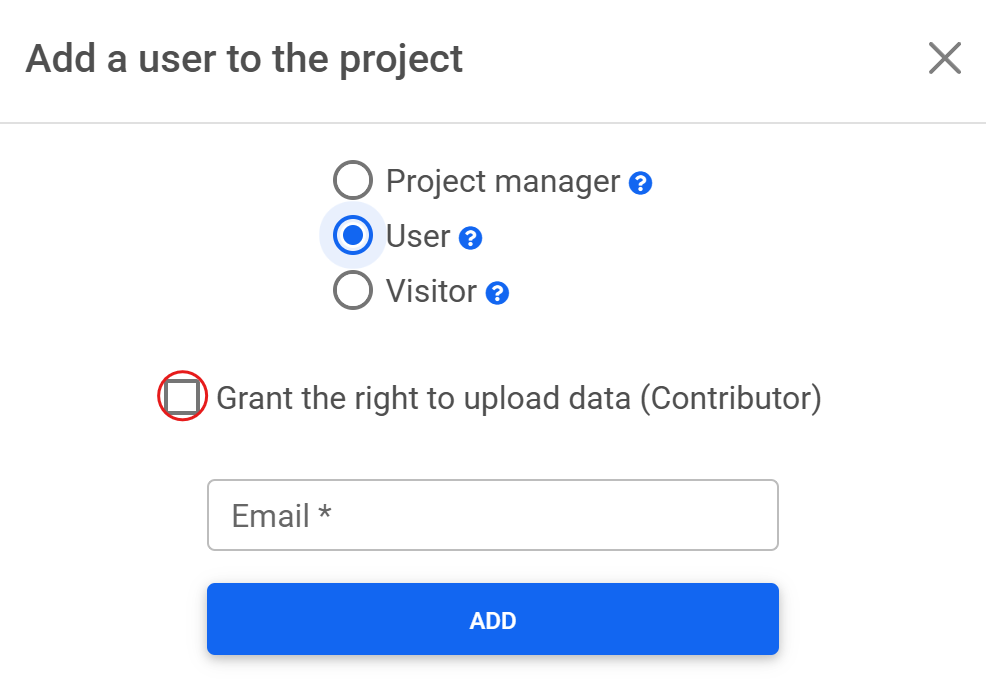
When adding a collaborator, you can choose whether or not they have permission to upload data to your GEO4X account and contribute to your project. Simply check the “Contributor” box if applicable.
4. Add an Administrator
The Administrator role is linked to your entire GEO4X organization, not just a single project.
To add an administrator, use the dedicated section in the right sidebar of the dashboard, under “Administrators”.

Summary table of permissions granted to each role
| Administrator | Project Manager | User | Visitor | |
|---|---|---|---|---|
| Dashboard Project Management | ||||
| Create / Edit / Delete a Project | ✓ | 𐄂 | 𐄂 | 𐄂 |
| Create / Delete Acquisitions | ✓ | 𐄂 | 𐄂 | 𐄂 |
| Create / Edit / Delete a Profile | ✓ | 𐄂 | 𐄂 | 𐄂 |
| Create / Edit / Delete an Organization | ✓ | 𐄂 | 𐄂 | 𐄂 |
| Definition of a public grouping | ✓ | ✓ | 𐄂 | 𐄂 |
| Data Usage | ||||
| Download data accessible to the user | ✓ | ✓ | ✓ | 𐄂 |
| View acquisitions accessible to the user | ✓ | ✓ | ✓ | ✓ |
| Take measurements (point, line, polygon) | ✓ | ✓ | ✓ | ✓ |
| Retrieve precise elevation/thermal data at each point | ✓ | ✓ | ✓ | 𐄂 |
| Take volume measurements | ✓ | ✓ | ✓ | 𐄂 |
| View saved measurements on accessible data | ✓ | ✓ | ✓ | 𐄂 |
| Automatic saving of performed measurements | ✓ | ✓ | ✓ | 𐄂 |