2D Display Settings
In GEO4X, you can easily customize the display of the DEM (Digital Elevation Model) and Othophotoplans to enhance your visual analysis. Here's how to use the various parameters available in the dedicated control bar:
👁️ Display / Hide
- Click on the eye icon to show or hide layers in the scene.
- This option is useful for comparing several layers (e.g. DEM vs. orthomosaic).

🌫️ Opacity
- The slider on the left adjusts opacity.
- The lower the percentage, the more transparent the layer.
- This makes it possible, for example, to subtly overlay the DEM with other data (orthophoto, annotations...).

📏 Altitude range
-
Two numerical values (e.g. 2 m - 15 m) indicate the visible altitude range.
-
Drag the handles to restrict the display to a specific elevation range:
- Useful for filtering certain topographical areas (e.g. high points only).
- Can be used to isolate flat or very steep areas.

🔁 Invert colors
- Activate the "Invert" button to invert the color palette.
- This can help contrast certain heights more or adapt to your visual preferences.

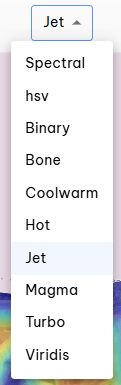
🎨 Select Color Palette
- Use the drop-down menu on the right (Jet, default) to change the color palette.
- Other palettes are available (e.g. Viridis, Hot, Bone...) depending on your needs for legibility or contrast.
🧩 Change layer order
You can change the order in which layers are displayed, to move :
- the orthomosaic in the foreground (above the DEM), or the DEM in the foreground, depending on your viewing requirements.
🔀 How do I do it?
- In the layer list (on the left of the screen),
- Perform a long click (click + hold) on the layer you wish to move,
- Drag it up or down the stack to change its display priority.
